Showing posts with label Rings. Show all posts

Sunday, 1 June 2014

Simple bead weaving tutorial

I haven’t done any bead weaving for a while, so I thought it would be nice to try something simple just to get into the swing of things again. This is a tutorial on how to make a ring with a flower detail and like the title says, it is nice and easy!


You will need:
Tweezers (useful when threading through the smaller beads as it can be quite fiddly!)
Scissors
Fishing wire (x 1m)
1mm White beads (x 54)
1mm Blue beads (x 8)
4mm Pink bicone bead (x 1)
4mm Blue bicone beads (x 6)


(Use more or less 1mm beads if you want to make a larger or smaller ring, the amount used for this tutorial makes a UK size M)


Step 1: Thread 5 4mm coloured bicone beads onto the fishing wire, move the beads so they fall to the middle of the piece of fishing wire. Then thread both ends of the fishing wire through a pink 4mm bicone bead.


Step 2: Then thread both ends of the fishing wire through the beads you threaded previously, as marked in the diagram. (The wire should go through two coloured bicone beads on both sides). Then thread the wire through another coloured bicone bead.


Thread three 1mm beads on one end of the fishing wire, repeat for the other piece of wire. Then thread both ends through a blue 1mm bead.


Step 3: Repeat the threading of 1mm beads until you have reached the desired length. Then thread both ends of wire through the 4mm blue bicone bead to make the ring shape. Thread the wire through the existing beads until both ends of wire are next to each other so you can tie a knot. 


Sunday, 6 May 2012

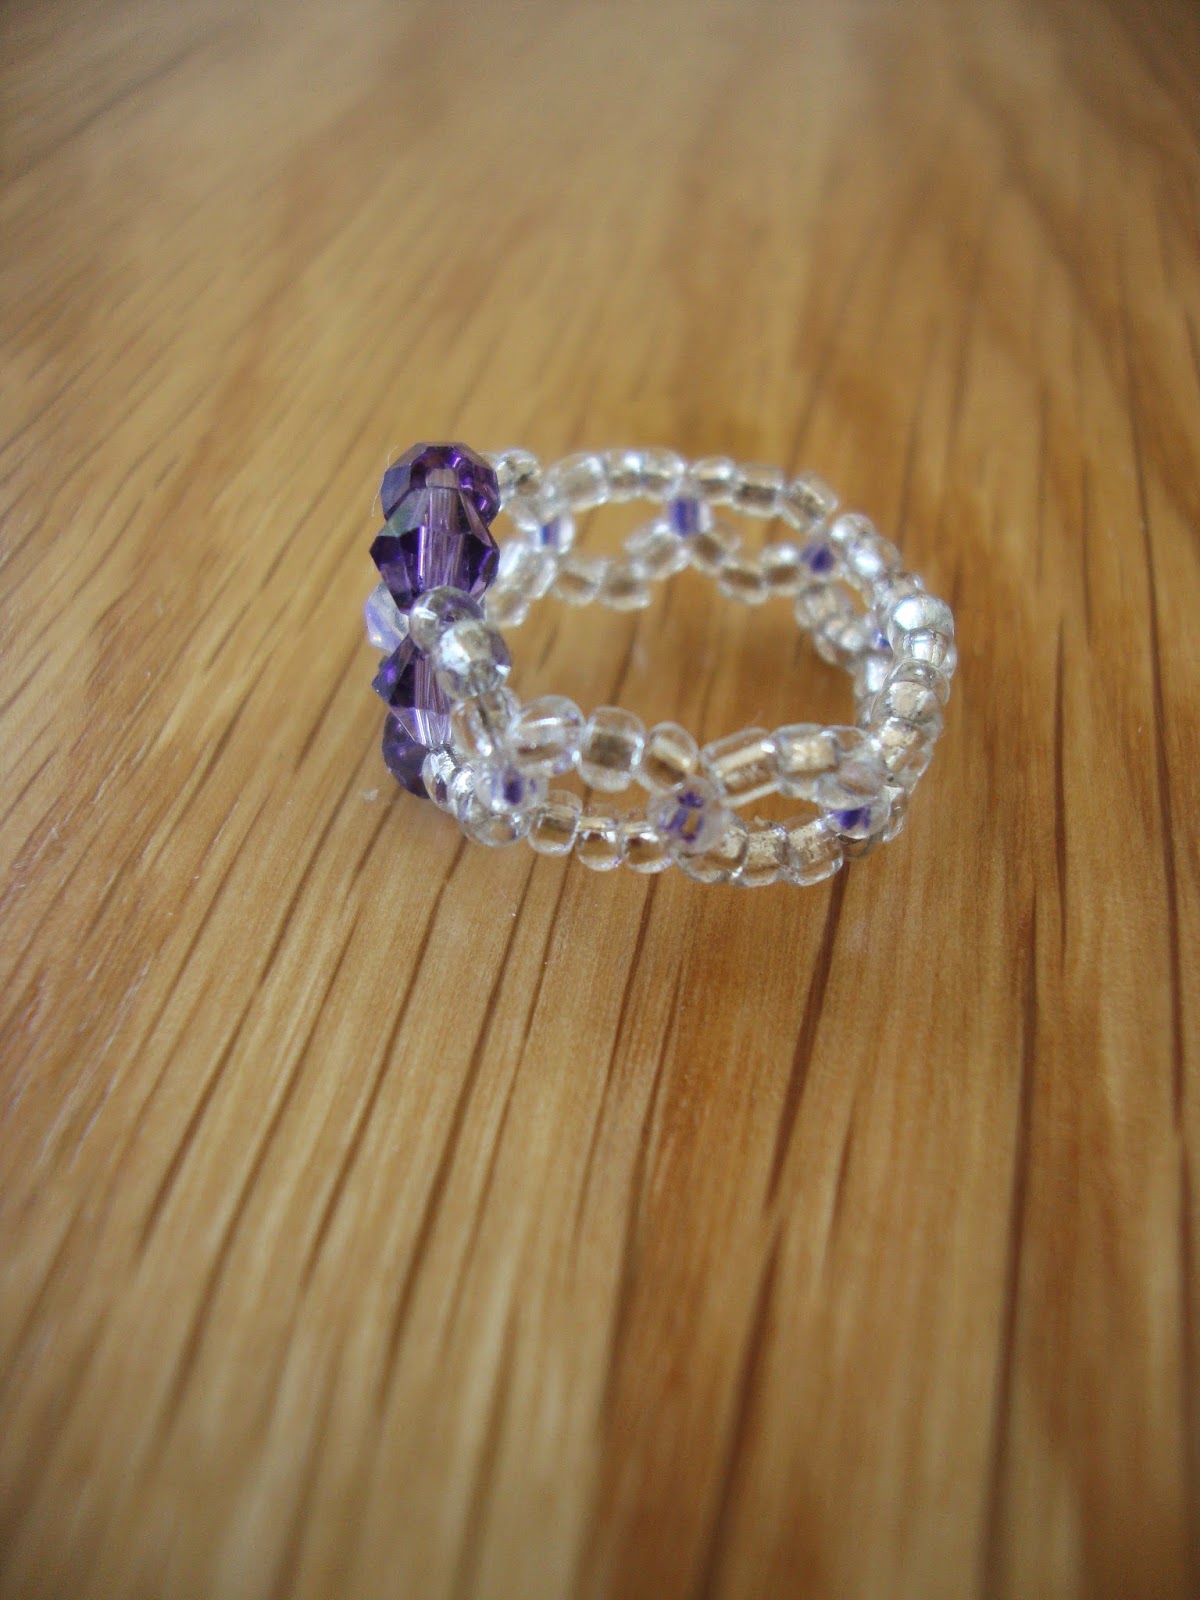
Bead ring tutorial! (chunky front detail style)

Another ring tutorial! This is number 6.

How to make this
I mentioned in the previous ring tutorial that I cannot own expensive rings but to make up for that I own lots of cheap(ish) rings. Recently I came across a big blingy looking ring that I really liked the look of from Folli Follie. Unfortunately it’s a bit pricey and way out of my budget, so, instead of scraping my pennies together I had a go at making my own cheap version!
I want this!: http://www.follifollie.co.uk/JEWEL/RINGS/MATCH__DAZZLE/3R0F059V-Match__Dazzle_Violet_Crystal_Ring/p_31_4_01_245_3763365_2.html


Ok it’s not exactly the same but it has a thicker front detail (which was the main inspiration for this piece).

My version! Ok its nothing like the Folli Follie ring but it will do for now...


The materials listed below make a UK size L ring. If you would like to make a smaller or larger ring all you need to do is adjust the number of 2mm plastic beads. But again use any colours you want. I originally wanted to make a blue ring (similar to the Folli Follie ring, but unfortunately I ran out of blue beads). Apologies if the description is a bit wordy, I re-read some of it and it sounds a bit confusing... People may find following the diagrams a bit easier.

To make this ring you will need:
Scissors
Tweezers
Roughly 1m of fishing wire
2mm White beads (I used ones with a blue centre) X 63
4mm Purple bicone beads X15

You will need...
Ok now for the instructions and diagrams:

Step 1:

Thread five beads onto the fishing wire (one 2mm white bead followed by a 4mm purple bead and so on). Make sure the beads fall to the middle of the fishing wire, making sure that the lengths on either side of the beads are of equal lengths. Finish the 'loop' but threading both ends through a 2mm white bead.

Step 2:

Then five more beads on both ends of the fishing wire. Make sure you start by threading a white bead first then the purple and so on.

Step 3:

Thread 5 beads onto one length of the fishing wire, finish this by threading the wire through one purple bead (from the previous 'loop'), white bead, and a purple and white bead you have just threaded on. With the other wire thread one 2mm white bead on and then through the purple bead (from the 'loop' you made on the other length), then add one white bead, one purple bead and finish with a white bead. Finish this by threading the fishing wire through the loop of beads you have just made (as indicated on the diagram).

Step 4:

Thread five beads onto one length of the fishing wire (starting with a white bead followed by a purple bead and so on). Finish this length by threading the wire through a purple and white bead from the previous loop. Repeat this with the other length. To finish this step off thread both ends of the fishing wire through one 2mm white bead and through a purple bead on either side of the white bead bead.

Step 6:

Add one 2mm white bead to both lengths of the fishing wire. Finish this step off by threading both ends through a 4mm purple bead.

Step 7:

Now to make the band of the ring. Add three 2mm white beads to both ends of the fishing wire and finish the loop by threading both ends of the wire through one 2mm white bead. Continue this until you have reaching the desired size for your ring. Once you have reached the desired size thread both ends through the purple bead on the other end of the front detail. 

Thread the wire through the beads (in any order you like) until both ends meet and you can tie a knot. Ta-da you have finished! Continue threading the wire through the ring to make it more rigid (you don't need to do this but I prefer to do this just to make it more sturdy).

Finished!

Monday, 30 April 2012

The collection so far

A pic of all the rings I have made so far. I have a few more ideas so expect more tutorials in the future!


Sunday, 29 April 2012

Diamond shaped beaded ring tutorial

Ring tutorial number 5! I don’t normally wear many rings anymore but I am obsessed with making them. I have lost loads over the years. I always take off my rings before washing my hands and then forget to pick them up again L 

So it is always nice to have a big selection of cheap rings (I cannot be trusted to own expensive rings anymore). 

For this tutorial I tried out two different style ring bands. Personally I think the style used for the red ring fits in better with the front detail. 

Diamond shaped beaded rings

Different ring band styles
The materials listed below makes a 17mm (approx) diameter ring. If you want to make a bigger/smaller ring you will just need to adjust the numbers of 2mm red and white beads. (Of course you can use any coloured beads you like!)

To make this ring you will need:

Tweezers (not pictured-but may be needed when threading through the smaller beads as it can be quite fiddly!)
Scissors
Fishing wire (x 1m)
2mm White beads (x 32)
2mm Red beads (x 22)
4mm White bicone bead (x 1)
4mm Orange bicone beads (x 4)

You will need... shocking photoshop skills used for the red bead :-S
Steps 1, 2 & 3:
Step 1:

Take your fishing wire and thread two 4mm orange bicone beads and one 2mm white bead (as indicated on the diagram). Let the beads fall to the middle of the fishing wire, making sure you have equal lengths of fishing wire on either side of the beads. Then thread both ends through the 4mm white bicone bead. (You will then have a 'loop' of 4 beads).

Step 2:

Add two more of the 4mm orange bicone beads, one on each end of the fishing wire. Finish this 'loop' by threading both ends of the fishing wire through one 2mm white bead.

Step 3:

Thread both ends of the fishing wire back through the 4mm orange bicone beads to put the fishing wire back to the middle of the piece.


Step 4:

Thread four 2mm red beads onto both ends of the fishing wire and secure by looping the fishing wire back through the first red bead you threaded on. Then thread through the 4mm orange bicone bead and white 2mm white bead. 

Step 5:

Now you can start making the ring band. To make this ring band start by threading a bead on either end of the fishing wire, then thread both ends through one 2mm red bead. 

Step 6:

Continue this until you reach the desired length for the ring band. Tie a knot and continue threading the wire through the ring to make it a bit more rigid and sturdy. Then cut the lengths and then you have finished!

If you prefer the other ring band style please visit: http://strawberrybox-serenie.blogspot.co.uk/2012/02/beaded-ring-tutorial.html

Finished!

Which ring band do you prefer?


Available to buy from my google checkout store too!

Monday, 5 March 2012

Flower Bead Ring


Hello. Here is another tutorial on how to make a ring out of beads (again... will put up posts to make other things in the future!)

Flower bead ring

To make this you will need:

8 pink 4mm beads
18 blue 2mm beads
56 white 2mm beads
About 1.5m Fishing line

Start by making the centre of the flower detail (a loop of four 2mm beads).

I would continue explaining how to make the ring but I think the diagram does a pretty good job of explaining. 

How to make a flower bead ring


If you want to make a bigger sized ring you will need more blue and white 2mm beads. The list of things needed to make this ring is for a ring size L. A size chart can be found here: http://static.shopify.com/s/files/1/0001/7511/files/RING_SIZE.jpg?1271979170

Thursday, 1 March 2012

Bead and wire ring tutorial


How to make....


You will need:

You will need...


50cm of 0.4mm thick wire
60cm of 0.6mm thick wire
A selection of beads (in a range of sizes)
A ring mandrel

1) Take a ring that fits you well (preferably one with a bit of space). Let it drop onto the ring mandrel and mark it with a pencil, this will be a guideline for your ring.

Mark the ring mandrel to use as a guide
2) Taking the 0.6mm wire, wrap it around the ring mandrel several times to create a ring. Once you have made the basic ring shape take one end of the wire and wrap it tightly around the wire ring four times, repeat this with the other end around a third way round the ring band. Cut the ends close to the band and using the pliers press the end into the band making sure any sharp edges are tucked in.

Wrap 0.6mm wire around the ring mandrel at pencil mark
Secure it by wrapping the ends around the ring band
3) Taking the 0.4mm, wrap one end at one of the ‘knots’ made on the ring band. 

Wrap one end of the 0.4mm wire at one of the 'knots'
4) Once you have done this, thread one bead onto the wire then wrap the wire around the band once. Take another bead, then wrap the wire around the band again, repeat this until you reach the other ‘knot’.

Thread beads onto the wire and then wrap the wire around the ring band
Continue adding beads
5) Once you are happy with the arrangement of the beads, finish up by wrapping the end of the 0.4mm wire at one of the ‘knots’. Again taking the pliers, tuck any sharp edges of the wire into the ring band.

Finished!

Purple beads

Blue beads

Pink beads


Monday, 27 February 2012

Another beaded ring tutorial


Wide Blue Beaded ring

Blue Bead Ring


To make this ring you will need:
Fishing line
24 blue beads
64 pale blue beads
64 white beads

This is quite a simple tutorial, just repetitive.

First start with one white bead and thread it onto the fishing line, making sure that the bead reaches the middle of the line (and ensuring the lengths of fishing line are of equal length on either side of the bead).

Then thread two more white beads onto the line, when you add the fourth bead make sure both ends of the fishing line cross through it to make a loop of four white beads...

Continue threading beads as indicated on the diagram...

I hope the diagram is easy to follow...


Here are a few more instructions which hopefully clear up any questions (the previous set of instructions probably lack a bit of detail!). Right click and save as to get a bigger view of the instructions (I can't seem to enlarge them any more on blogger!


If there are any questions please do not hesitate to put your questions in the comments box below and I will try and get back to you!

Saturday, 25 February 2012

Beaded Ring Tutorial

This post is a tutorial on how to make a ring out of (mostly) 2mm plastic beads. It can be a little fiddly but the tutorial for this is much easier to follow than the mouse ball charm tutorial I posted up a while back.

A ring made out of plastic beads is a nice alternative to metal (especially if you are allergic to metals). Also using fishing line to thread the beads gives the ring some flexibility, but you can use wire if you want the front detailing to lie flatter (rather than rounded).

White and pale blue bead ring

Blue and White bead ring


To make this ring you will need:

Fishing line
2mm beads in white X 42 (depends on how large you want to make the main band of the ring)
2mm beads in blue X 13 (depends on how large you want to make the main band of the ring)
4mm Swarovski beads X 8 

1) All you need to do is use one long one piece of fishing line thread one bead onto it.

2) Let the bead fall about half way down the fishing line, make sure that you have equal lengths of fishing line      on either side of the bead.

3)Then keep threading beads on both ends of the fishing line and make sure that both ends of the fishing line cross through the middle bead.

4) Keep going until you reach the desired band length, use both ends of the fishing line to cross through the first bead you threaded.

Beaded Ring Tutorial Diagram


Bead Rings